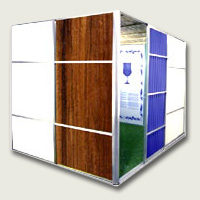
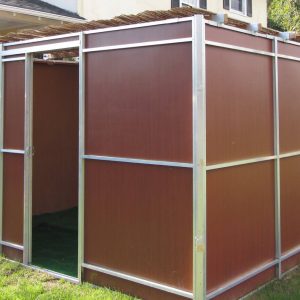
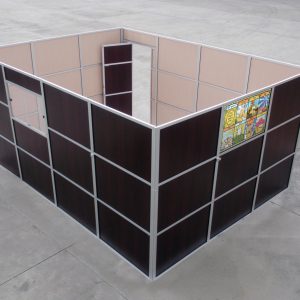
Flat Fibreglass Sukkah
Price range: $2,885.00 through $4,555.00
You may also like…

Instructions
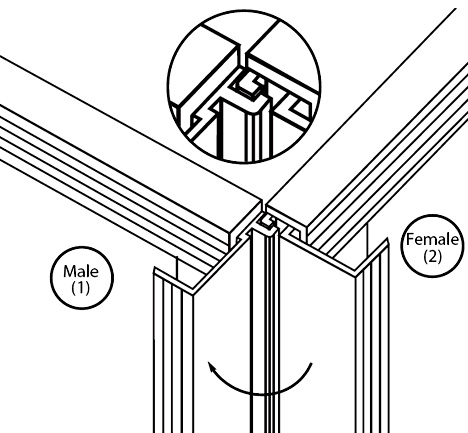
1. PANEL TO PANEL ASSEMBLY
NOTE: All panels and corner sections work on a Male/Female assembly system. So using two Male sides or two Female sides (of matching panels or corner sections) will not work.
Don’t leave Window or Painted Panels for last, since they can’t be turned upside down.
Position panel at a 45° angle then insert side of panel (1) into female side of panel (2), as shown in diagram. Swing panels into place. (see arrow) All support bars should be facing the outside.
The door panel is the same size as the wall panels and may be subsituted for any wall panel throughout your sukkah.
If panels don’t match up, turn one panel upside-down. (there is no top or bottom to the panels)
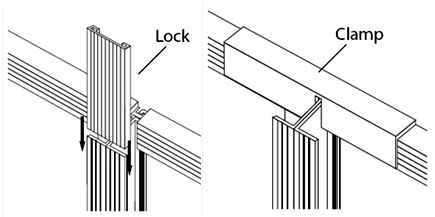
2. PANEL LOCK INSTALLATION
After each panel to panel connection is made slide lock over outside flange of panels to secure the panels in place (see diagram)
NOTE: The lock is used to lock the panels together and is not used in the corners.The lock should be slid down to the panels first horizontal rib.
To double secure both panels a 6″ clamp is placed on the top of the panels. (see diagram)
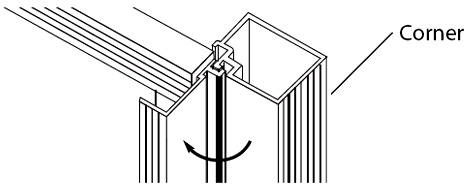
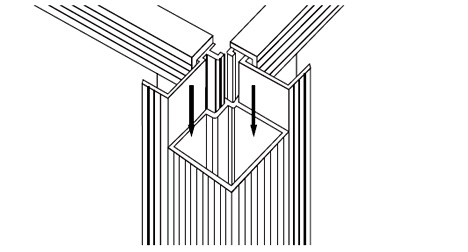
3. CORNER ASSEMBLY
Hook female side of corner section into male side of panel then swing in the direction of arrow shown in diagram.
NOTE: The next panel is assembled to the male side of the corner in a similar fashion.
Two half corners should be left for last
4. ASSEMBLY OF LAST CORNER
(This step is for 4-sided sukkahs only) On a 4-sided Sukkah one corner must be left for last.This last corner will use the two half corner sections to join the last two panels together.These two short corner sections are to be slid into place, (not hooked) starting at the top of the last corner and sliding down.
NOTE: You may need a step-ladder to see that you are sliding the corner sections in properly.
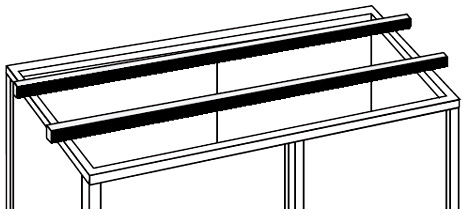
5. TOP OF SUKKAH WOOD BEAM ASSEMBLY
Place 2″ x 3″ lumber beams on the top of the Sukkah, as shown in the diagram.
NOW YOU CAN PUT ON THE SCHACH AND YOUR SUKKAH IS COMPLETE.
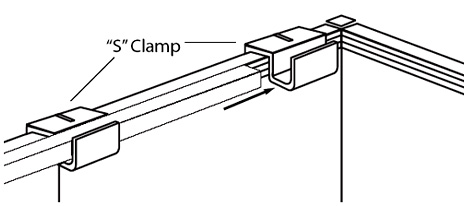
6. FOR LARGER SUKKAHS
Special top “S” clamps have been provided to give the side walls greater rigidity and stability.
Slide wood bars into position as shown in diagram.
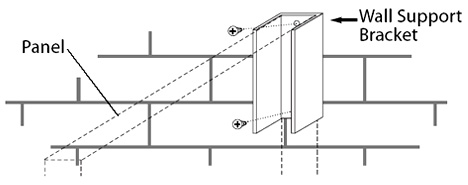
6. FOR SUKKAHS WITH ONLY THREE WALLS
Attach the two (2) Wall Support Brackets to wall with screws.This can be a permanent installation.
Slide Sukkah panel into bracket as shown in diagram.
Related products
-
Wood Panel Sukkah
Price range: $2,885.00 through $4,555.00 Select options This product has multiple variants. The options may be chosen on the product page -
New Wood type Sukkah
Price range: $2,025.00 through $3,765.00 Select options This product has multiple variants. The options may be chosen on the product page